I’ve discovered over the years that I have a pretty good knack for this sort of work because I can visualize how the final version should look, and I have that in my head while I’m working.
Every restoration is different and requires different tools and amounts of time. This is why I need to see an original photograph to give an accurate quote. I schedule an appointment with a client and evaluate each piece individually. I tend to “think out loud” when working through how to approach each piece so that the client knows I’m not just picking random pricing out of the sky. I show them that here’s what I need to do to fix whatever needs fixing.
It’s also important to note that no originals ever get sent out. Ever. They stay in my studio, in my possession. Precious family treasures live in my studio until clients retrieve them personally.
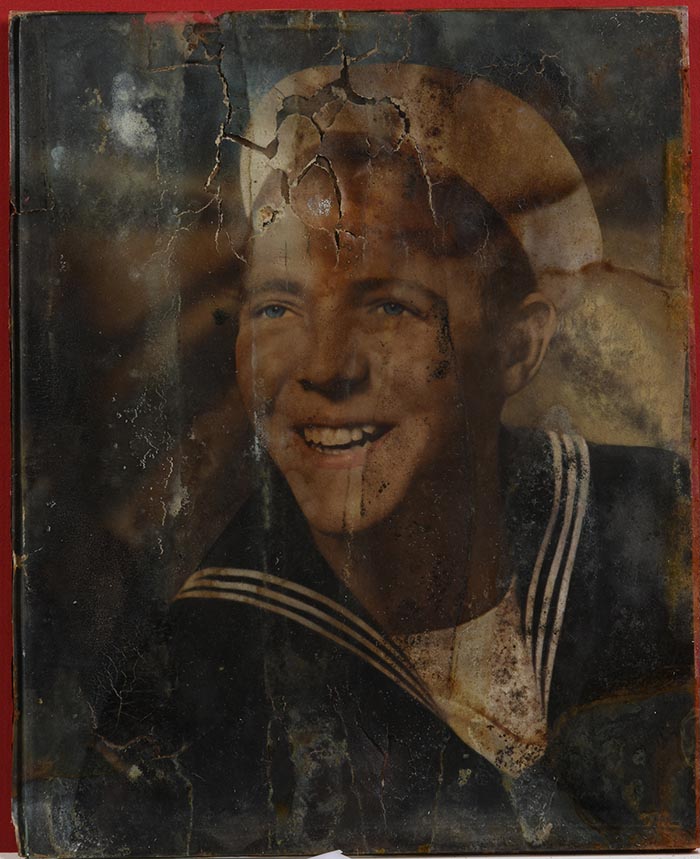
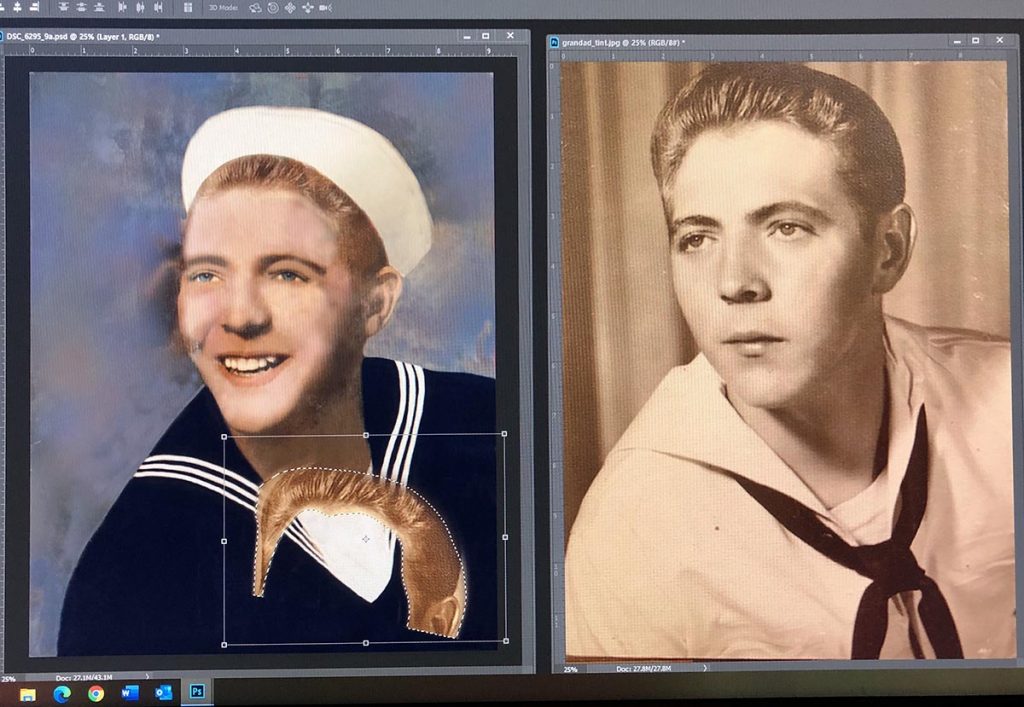
Let’s talk about Sailor Dan, I will walk you through my process so you can see how the before becomes the after. Before: Oh my. I had to gently pry away the rusted metal frame he was in, and that got discarded with the client’s permission. This original image was hand colored.
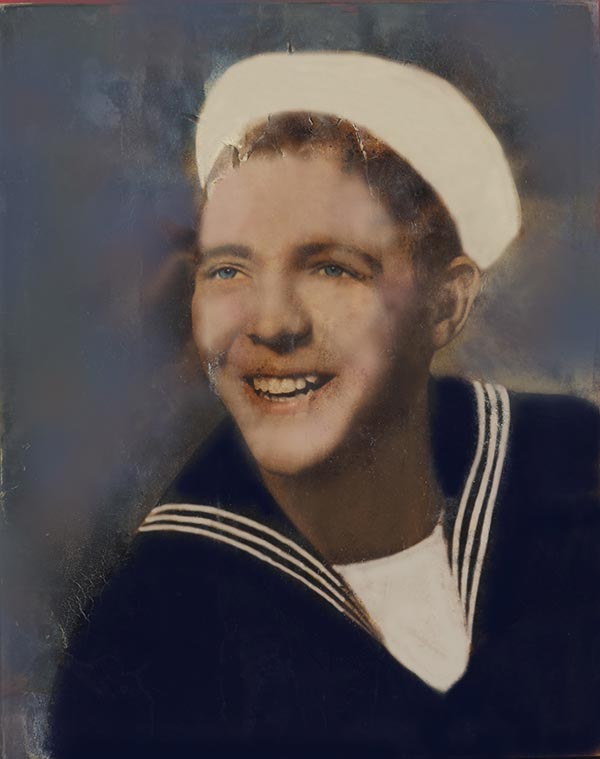
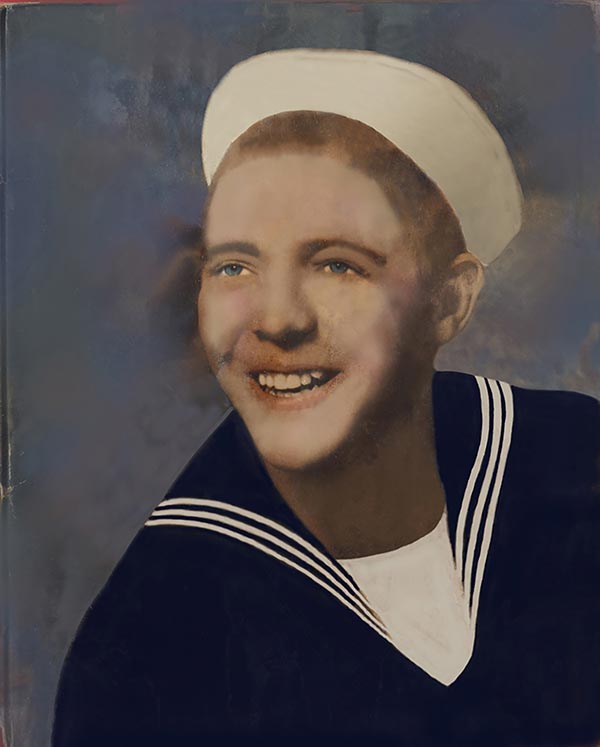
In these versions (2 and 4), these are showing my progress. He looks a bit “ghostly” here because I had to lay down some lighter tones to cover the smutz but still leave his bone structure and shadows in place. I blended other darker tones in varying degrees of opacity to get the final version.
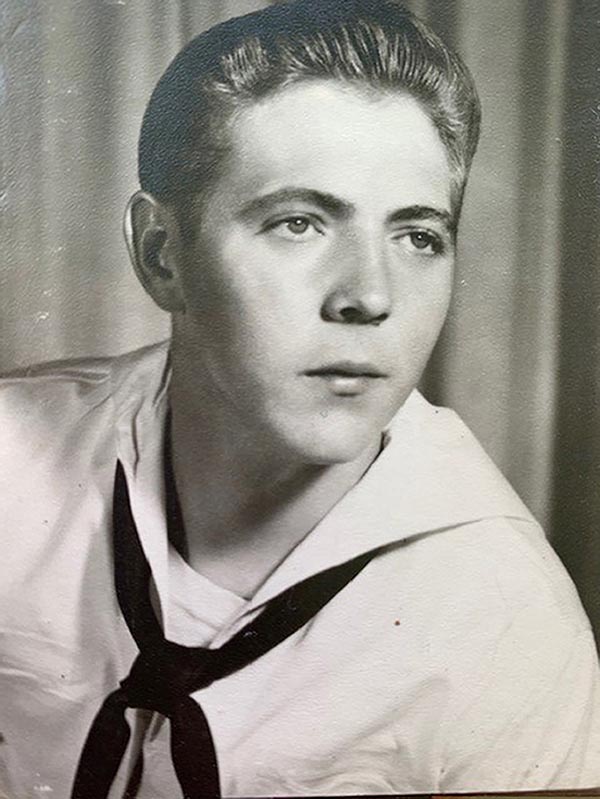
By the time we get to Version 8 I wasn’t quite sure I was on the right path: I had to email my client with this progress image because I didn’t like his hairline it looked “manufactured” and it was. But you can see from the original I had nothing to go on. Luckily, she had the black and white image that showed his hairline. I flipped it to the same direction, tinted it to approximately the same tones as his hair, and selectively blended it to get the hairline accurate. I actually backed up to a previous version and re-finished a few elements to get it exactly right, the way I saw him in my head.
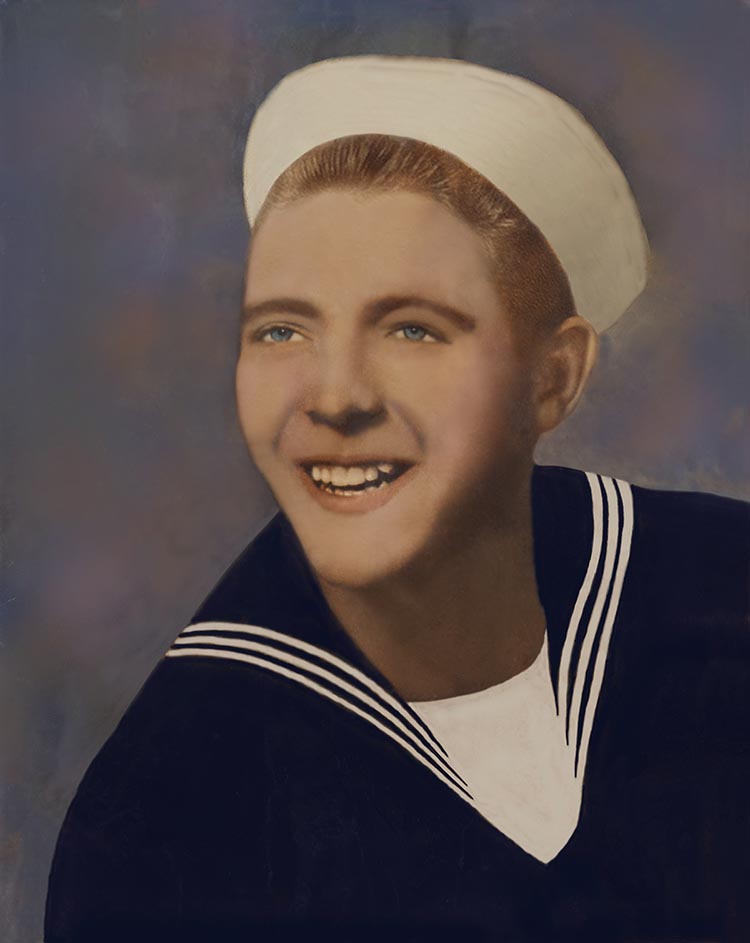
Once I finished with his hair, I tinted it a little redder so that I could blend the skin tones. Skin is never just one color—it’s actually very dynamic so I was able to blend some of the tones with this one to give him more dimension around his eyes and eyebrows, as well as subtle shadows here and there, and more detail in his ear.
These sorts of restorations are an exercise in OCD tendencies for sure. I actually had 2 other “finals”, but I’d study it, and fix something. Study it, fix something else. And something else until finally I had to save a final version and tell myself “enough…he’s fabulous.”
As you can see a lot goes into photo restoration (and in some cases like this, reconstruction). I have a lot of passion for my work and love bring an old family photo back to life so many more generations can love and admire them. I put my all into my work and it can be a very emotional process, follow me on Facebook and Instagram to check out some of my progress and watch how I bring things back to “life.”